Is it me or is there something about staying at home that just screams cinnamon buns? Being at home with my family (and now 8 months pregnant!), we’ve been busy in the kitchen making more traditional treats than usual. I can’t tell you how much I’ve been loving it! These Rustic Vegan Cashew Butter Sticky Buns have become a favorite for my sister and I to make together over the last few weeks.
Thinking about it, I don’t think I have once purchased wheat flour in the last five years! How nuts is that? Although I aspire to get into sourdough making (and I frequently devour sourdough bread from Lodge Bread Co!), I generally stick to my trusty paleo flour blend for my home-baked goods. Finding myself in Europe for the next few months and without so many of my pantry staples, I am back to experimenting with some more traditional baked goods—with somewhat of a healthier twist, of course!
— See: My Pantry Essentials —
A few weeks ago, my sister and I started experimenting with this sticky bun recipe from Minimalist Baker. We changed it quite a bit from the start, mostly because I am not a fan of the inflammatory seed oils so widely used in vegan butters and spreads. We had enough people asking on Instagram (and neighbors who we sneaked a few buns to) that we knew we were on to something pretty sweet! On our third time making these, we wrote out the recipe in hopes to inspire some fun quarantine baking.
These buns are rustic, cinnamon-y, not too sweet, and perfectly hearty. Your end result will depend a lot on the type of flour you use. You can yield a more traditional bakery-type bun by using regular white flour or a blend of white and pastry flour. For our last batch, we used 100% whole wheat flour for an earthier, more rustic bun.
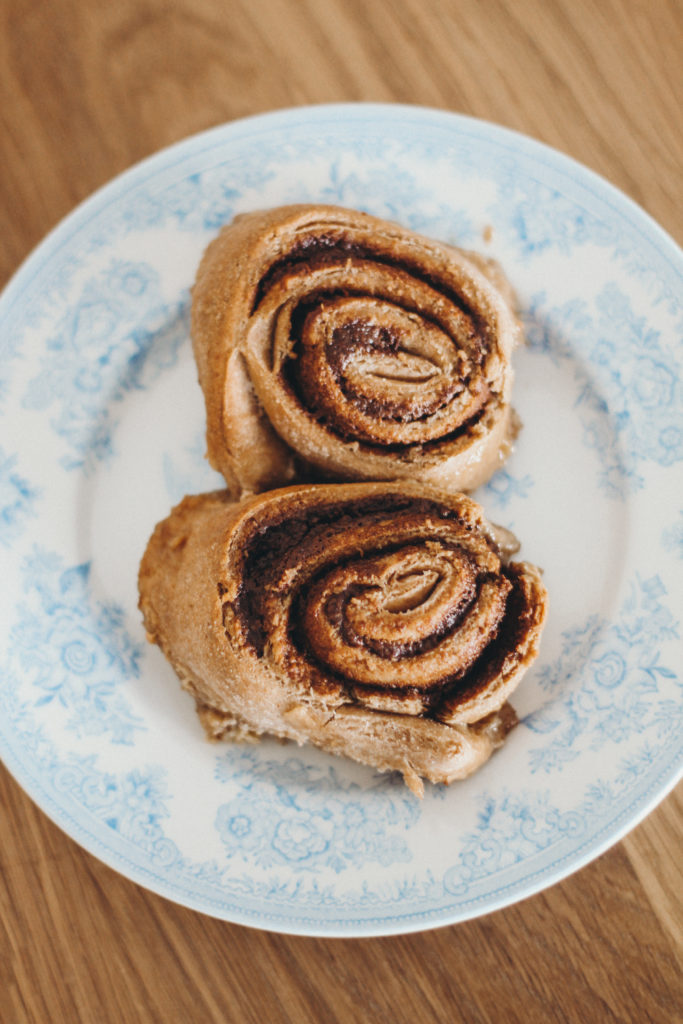
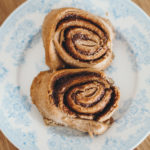
Unsurprisingly, the sticky glaze is the highlight of these buns! It is made with cashew butter, extra virgin olive oil, pure maple syrup, virgin coconut oil, good salt, and chopped walnuts or pecans. We have made these both as sticky buns, pouring the glaze on the bottom of the baking pan as pictured below, and as regular cinnamon buns, with the glaze poured on top afterwards (while still hot!). The batch pictured was made “sticky bun style” and I decided to serve them sticky side down, purely because I preferred the aesthetic. This is totally up to you and these buns will be delicious whichever way you choose to make and serve them.
Once your dough has been made and given time to rise, you’ll spread the dough out and cover it with a layer of the cinnamon filling. The filling is made with virgin coconut oil, extra virgin olive oil, cashew butter, coconut sugar, cinnamon (we used a mix of Ceylon and regular), and maple syrup. This works great as a filling for regular cinnamon buns as well, as does this whole recipe if you feel inclined to make it without the glaze.

Ingredients
Dough
3 cups organic wheat flour (you may need to add a little extra if your dough feels too wet)
1 cup coconut milk + 1/4 cup water
3 tbsp virgin coconut oil
1 packet instant yeast (7 grams)
1 tbsp coconut sugar
1/2 tsp fine sea salt (I used Celtic salt)
Filling
2 tbsp virgin coconut oil
1 tbsp extra virgin olive oil
1 tbsp natural cashew butter
1/3 cup coconut sugar
1 1/2 tbsp cinnamon (add additional 1 tbsp if using Ceylon cinnamon)
1 1/2 tbsp maple syrup
Glaze
1/3 cup pure maple syrup
1/4 cup + 1 tbsp natural cashew butter
2 tbsp virgin coconut oil
2 tbsp extra virgin olive oil
1/2 cup raw or sprouted walnuts or pecans, finely chopped
1 tbsp vanilla extract
1 tsp fine sea salt (I used Celtic)
Instructions
- In a medium saucepan, heat the coconut milk, water and coconut oil until just gently melted. Remove from heat and let cool until lukewarm. (It should be warm but not too hot as this will kill the yeast).
- Transfer the mixture to a large mixing bowl or stand mixer and sprinkle the yeast on top. Let activate for 10 minutes, then add the coconut sugar and the sea salt. Stir to fully mix.
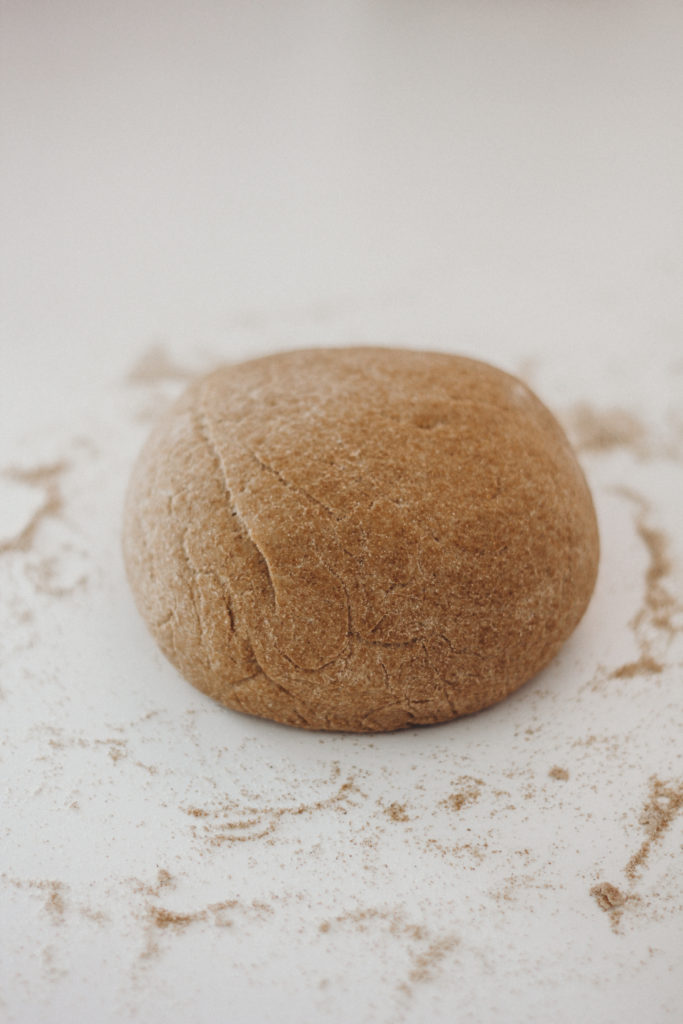
- Add in flour 1/2 cup at a time, stirring as you go. The dough will be sticky. When it is too thick to stir (it’s okay if you don’t get to 3 cups, or if you have to go a little over!), transfer to a lightly floured surface and knead for a minute or so until it forms a loose ball. Add more flour as you go as long as it continues to absorb into the mixture.
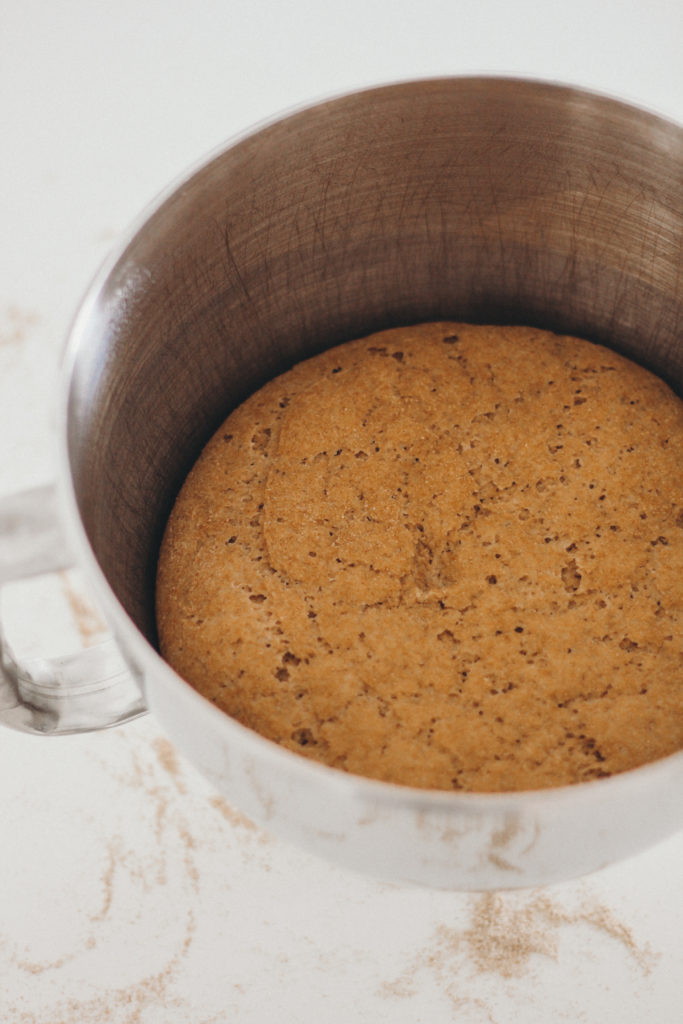
- Add your dough ball back in the bowl and cover with plastic wrap or a wet tea towel for about an hour, or until doubled in size.
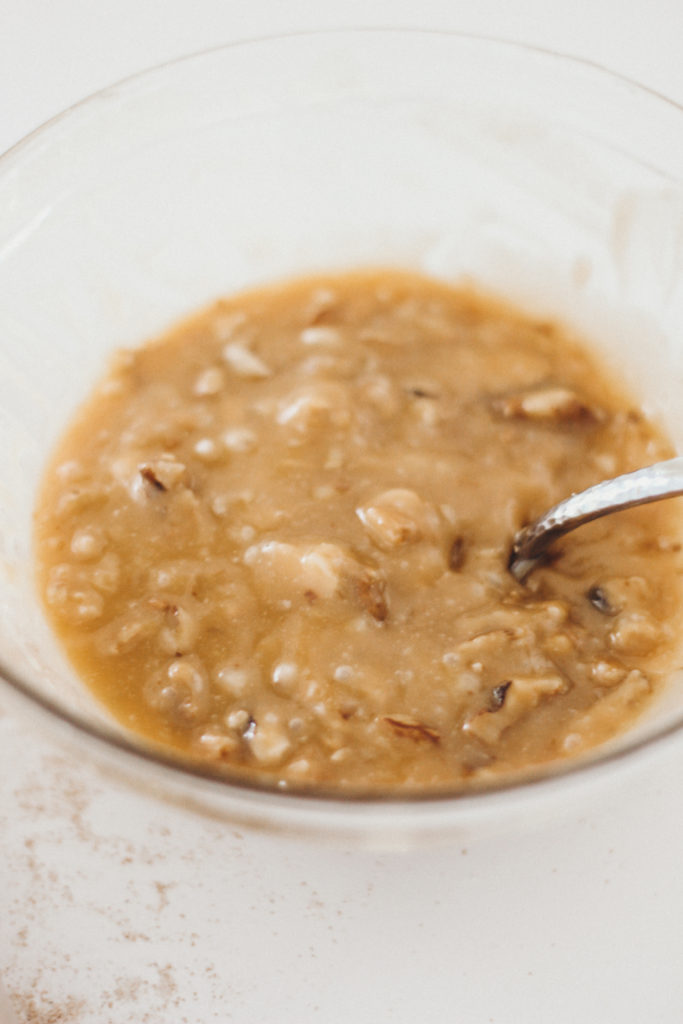
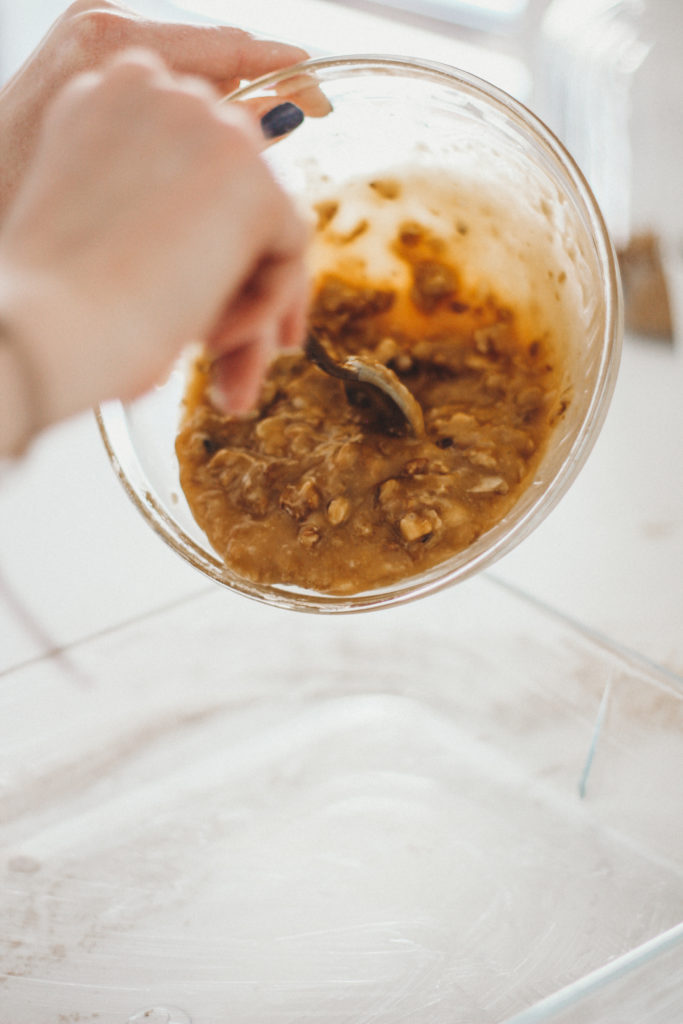
- While the dough rises, prepare your sticky glaze by mixing the ingredients together, adding the nuts last. You may wish to melt your coconut oil beforehand if it’s very solid. My coconut oil was relatively soft and I was able to mix everything together without having to melt it beforehand. (Note: small chunks of solid coconut oil will melt in the baking process anyway, if you plan to line the bottom of your baking dish with the glaze).
- Once you’ve made your glaze either put it aside (if you plan to add it on top of your buns once baked), or spread it in an even layer on the bottom of your baking dish (we used a 8 by 12 inch). If choosing to add the glaze on afterwards, just coat your baking dish with coconut oil.
- Set aside your baking dish and make your filling by combining the filling ingredients in a bowl.
- Once your filling has been made, bring your dough over to a lightly floured surface and roll it out into a thin rectangle. Gently spread your filling over the surface, as evenly as possible.
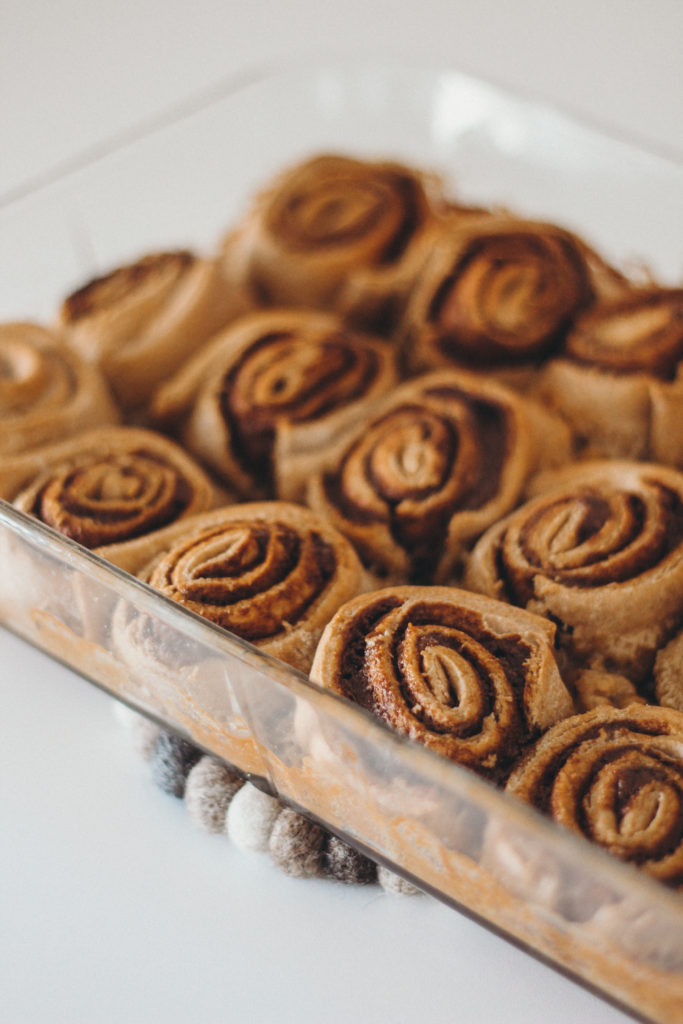
- Starting at one end, tightly roll up the dough. Then cut the dough into 1 to 1.5 inch sections and place each bun into your baking dish. (You should have between 12-18 rolls and most should fit in a large baking dish).
- Cover the buns again and let rise while the oven preheats to 175°C/350°F.
- Once the oven is hot, bake rolls for 25-30 minutes or until slightly golden brown. Let cool for a few minutes, and if you placed the sticky glaze on the bottom, you can invert the buns. The first time around, we served ours sticky side down as we felt they were prettier that way and it was nice to have a little surprise on the bottom. Now I prefer to make these by pouring the glaze over the top while still warm.
Once these are out of the oven, you can flip them over onto another platter if serving as sticky buns, or drizzle your glaze on top if you saved it until now! We love eating these right out of the oven. Word of warning: this size batch doesn’t last very long in a house of six.
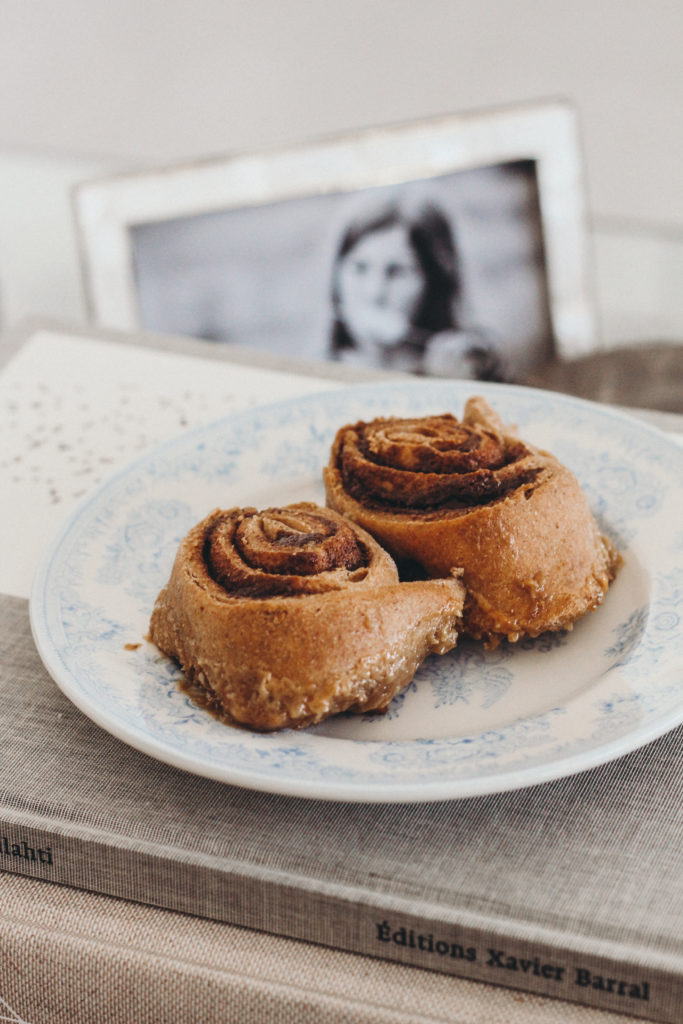
Enjoy these as an afternoon treat with coffee, a mid-morning snack, or even for breakfast if you’re just in the mood for something sweet (you could certainly do a lot worse!). I’ve been abiding by very few of my usual rules during both pregnancy and this quarantine, and when I enjoy something like this I enjoy it fully and without guilt! I hope these turn out as well for you as they did for us!


Leave a Reply